I am always doing that which I cannot do in order that I may learn how to do it...Picasso

Tuesday, September 25, 2012

At The End of the Day

I can't believe it's finished!  The studio is complete.  I want to stand in the middle of Time's Square, jump up and down and yell out, "It's done!  It's finished!  It's beautiful!  I did it!!".  In lieu of that, I'll just share with you.

It took me a couple of weeks but I seem to be able to find everything again, which, when you move your home, office, studio, is always a challenge.  Motor memory has you reach for something where it used to be then there is that moment where you know it's somewhere else but where?  Oh yeah.  You remember.  It just takes time - and a good label maker.


Let's start with the Mother Ship.   For those of you that don't know, I began my then mosaic hobby shortly after my son stopped wearing diapers.  I took his Ikea changing table down to the basement and it was just the right size for my small projects and storing my materials.  Now I use it as a desk to sit and sketch, plan my pieces, research and work out grout formulas.  I store my lazy susans in the place where I used to keep the diapers.  All my different mixes and colors of grouts are in the cabinet below.  The shelves to the right are a cart that I found at the Container Store.  It was on sale for a few bucks because it is missing its wheels.  Perfect for my measuring tools, miscellaneous tools and my all important band aids.  Believe me, I use them daily!


 What a thrill to have all my paints in the same place, neat and organized so there is not all that wasted time searching for that can of Ralph Lauren paint I used last year on that chair that I made for what's-her-name.  In the renovation, I tossed out all the questionable paint - craft, acrylic, latex, spray and kept what I can use from the container without working some voodoo with water and sometimes toxic fluids.  When doing such a thing, make sure you contact the waste management in your area to find out where to dispose of toxic materials.

The painting of the blonde up there was done by me when I was 4 or 5 years old.  I had found my grandpa's old oil painting kit.  I loved that he was an artist and I wanted to try my hand.  It is another touchstone for me.

The clay bas relief of the two dancers (I was a dancer in my first life so everything I did centered around dancing and dancers) was done in the most amazing art room that a public high school has ever seen.  Bellevue High School in Washington state (home now to Microsoft) had a nearly professional art studio with totally cool and hep cats teaching there.  It was the best place to go when skipping geometry.

It takes new choreography to move about and get used to working in my new studio.  In it's own way, it's like a new neighborhood.  I still have to find the best way to get there, the shortcuts and sweet spots.  While writing this series I have revisited pictures of the dark, dank, grey hole it used to be complete with the creepy insulation falling on my head.  Each time, the memory of working in that environment gets further away and less familiar to me.  Hasn't it always been this way?


We often make excuses about why we should keep things the way they are.  It's too hard.  It's not worth it.  It costs too much.  I can't do it alone.  Really, we just don't want to change.  Honestly though, nothing is more refreshing, more invigorating, more stimulating than change.  It's not necessarily a fear-free endeavor but the heart pounding shot of adrenaline that propels us forward wears off into a sense of well being because we have accomplished something and did something we weren't sure we could achieve.

At the end of the day, the only thing that is constant in the universe is change.


Tuesday, August 28, 2012

The Big Renovation - Let there be light

What an amazing feeling is was to enter my shiny, new, clean studio with no insulation hanging down and walls and floor that would no longer produce equivalent amounts of dust as my work.  The next task at hand was the lighting.  Lighting is a real issue for me no matter what the purpose of the space.  Partly, it is my need to see shapes and colors clearly and as vividly as possible.  The other is that I have severe migraine syndrome and my eyes are more sensitive than most to light temperature, hue and most importantly, strobing.


With these considerations, I had made up my mind that track lighting with incandescent light fixtures was the way for me to go.  Ikea (my beloved Ikea) makes a track that can use any one of their fixtures from large work dishes to pinpoint spot lights.  My intention was to install track along the length of the room with two rows running parallel to each other.  I made my pilgrimage to the Paramus Ikea only to find that they were renovating the Marketplace and the only lighting products available were light bulbs.  Damn you Ikea!  The no-brainer was to stop at Home Depot on the way home and see what they had to offer.  There were kits with 4 standard, old fashioned looking fixtures and a 4 foot track or I could buy it all a la carte with variable lengths of track ranging from 4' to 12' and then buying any amount of fixtures I felt I needed.  This was within my budget (under $200) so I began to collect what I needed only to find that there were 4 of this item but not the 10 that I needed.  There was one 8' length of track in white but 10' only came in black.  The frustrating reality was that I could not assemble, in one cart, all the parts I needed, in white.  The question was, did I want to drive from Home Depot to Home Depot hoping that after covering a 50 mile radius I would accumulate what I needed?  No way.

Back at home I began shopping online for track lighting and discovered that most track lighting has converted to halogen and in some cases LED.  Halogen is very hot and does not give a good wash of light.  Most importantly, anything that was recommended for illuminating galleries, the closest use to studio light that was referenced in specs, was waaaaaaaaaaaaaay out of my price range.  I have a philosophy that if something doesn't come together after pushing the rock halfway up the hill, it's best to step aside and see what happens.  I was beginning to feel that whether or not I knew it, this track lighting thing was not really what I was looking for.

Now a week had gone by, the space was ready to use but there was no light except for the two exposed bulbs in the ceiling.  I was getting anxious  (I am always on some self-imposed schedule that no one is sticking to but me.  I guess that's how I get things done).  Let me interject another one of my structural limitations - because the room is a raw basement there are no electricity sources except the bare light bulb fixtures.  I had screwed an adapter into the ceiling socket wherein you could screw in the light bulb and have two additional outlets. That's where I plugged in my clip lights.  I was determined not to call in an electrician to do any hardwiring so I Goggled on.

And it's a good thing because I got a swell little education on lighting that has enriched my life (no sarcasm here - I'm serious).  I Googled "art studio lighting" and most of the information was about how to light a photographer's studio.  On about page 2 or 3 I found a blog from a painter who struggled with how to light a painter's studio and had shared his exhaustive research in the post.  I tip my hat to him and want him to know he saved me endless research and helped me to achieve my lighting goals.  Here is the link to that blog if you want the overview that I used as my jumping off point.   http://www.westerberg-fineart.com/2011/05/studio-lighting/

Westerberg's blog provided a link to a more scientific explanition about light, explaining the whys and hows certain kinds of bulbs put out the light that they do.  This is that link:  http://stereopsis.com/fullspectrum/.  The article from Stereopsis explains the concepts of Color Rendering Index (CRI), color temperature and Kelvin.  It's not necessary to totally understand all this science but the explanation of  what elements produce the light we use gives you a relative grasp of what you need to know to allow you to understand the numbering and labeling of light bulbs.  (As we all switch over to CFLs this info is useful to everyone.)  I arrived at the conclusion that the best way to reproduce natural daylight and artist friendly light is by using fluorescent tube lighting.  (Did you hear the cartoon brakes screeching to a halt there?)

When I collected myself and read further I learned that there are newer, thinner fluorescent tubes that don't hum, flicker and turn on immediately without the expected warm up period.  Better still, these thinner tubes can be used in inexpensive fixtures available at Home Depot and the like, for very little money.  Even better, though they can be adapted to be hardwired, fluorescent light fixtures come with a cord and a plug.  All I needed to do was hang them up from the beams and plug 'em in.  Woohoo!  I chose a different style fixture thanWesterberg.  I selected an industrial, shiny fixture both because I liked how they looked and I felt that the shiny surface would give me just a little more light splash.  The were about $35 a piece.


My fixture uses T8 tubes (explanation @ Stereopsis) and the particular bulb recommended for full spectrum light is not available at Home Depot or Lowes.  They can be purchased on Amazon but I found a store in Manhattan called Just Bulbs (http://www.justbulbsnyc.com/Home.html) and I'm pretty sure they have any light bulb ever made.  They also have curbside pick up service (wow! in NYC) and take orders over the phone or by email. I ordered my 8- Phillips TL950's over the phone and they were delivered to my home in 2 days.  Let me add another note here.  When I bought the light fixtures I bought a couple of bulbs that were T8 tubes with a Kelvin similar to the more expensive Phillips bulbs to see if they were the same or at least similar enough.  They absolutely were not.  The difference, using a white sheet of paper was significant.  Though the Phillips bulbs were nearly $10 apiece, they were worth it and I won't be replacing them for several years.  The cords from the fluorescent fixtures plug into the into the light bulb outlets and I am more than pleased with the results.  I love that each fixture has it's own pull chain and I choose to turn them all off independently and use the wall switch to turn on and off the incandescent bulbs.  My husband keeps trying to get me to shorten the pull chains on the lights so they don't dangle down at face level but I refuse. I don't know.  There is something about having those ball chains hanging down around the room that charms me.  Maybe they look like room jewelry to me.  I don't mind walking into them and love how it feels when I pull the chains down to turn them off. 

Finally, there were the bare bulbs and what to do with them both functionally and more importantly, cosmetically.  I found these down shades for more money than I wanted to spend but for the affect and the time I saved by not searching for the perfect thing, I really like them.  Yes, there are black cords running along my imperfect fabric ceiling but I don't care.  Know why?  'Cause I can see!  I also don't seem to have any adverse reaction to the fluorescent tubes.

Light is both functional and an concept in human life.  We need light to see what we are doing - our work, reading, watching and performing the most mundane tasks.  Illumination is critical now that we don't live with the rhythms of the sun.  We also speak of light as it pertains to what lives withing all of us.  We put things "in the light" both physically and metaphysically.  We bring it into the light to see what "it" is or to resolve a long lingering problem.   We shine our light on what is in the dark and what is dark within us.  Though lighting has been important to me as someone from the theatre and now an artist, I have never taken the initiative to try to understand how many different kinds of light there are and what their differences are.  Knowing more about light than I did before gives me more spectrums through which to see things in my life.  I encourage you to know your light better.


Before there was light


After light
 
 
Next week:  The End...or Just the Beginning
 

Friday, August 10, 2012

The Big Renovation - It Continues

With the floor and walls all painted and fresh it was time to attack the dreaded ceiling - a short review.  One of the things that pushed me over the edge and helped me make the leap into this renovation was that the insulation in between the beams above me was falling in creepy, spidery- feeling clumps onto my head and it just looked like something out of an episode of Hoarders. I could stand it no more!


A couple of years ago, my friend Connie and I visited the home and studio of Russell Wright in Garrison,NY (If you locals have not taken this pilgrimage, I say it is a must see).  Wright has been a design hero of mine since childhood.  In fact, one of the great traumas of my childhood is when we moved from New Jersey to Colorado and my father couldn't get one more thing into the truck.  A few boxes were left behind in the garage of the old house as trash.  The contents?  My mother's entire set of Russell Wright dishes.  A few large serving pieces were saved but sometimes I think what it would be like to have all those glorious dishes.


When we walked into Mr. Wright's studio it was a very clean, spare, mid-century modern space.  Pretty much what you would expect from a designer of his time.  The ceiling caught my eye though.  There was burlap stretched taught from one end of the room to the other and stapled along the beams.  It was so simple and tidy.  I made a mental note - in red Sharpie.

Unlike Russell Wright who worked above ground in a very squared off studio, I work underground where all of the water, sewer and electrics of the house converge and huddle in mounds of nasty pee colored insulation.  Nevertheless, I knew that this burlap thing was a much better and more cost affective way to cover the entire mess

I decided I wanted to do alternating stripes of white and natural colored fabric and I bought two bolts (40 yards) of each color.  I think we figured we needed 77 yards and believe me, in the end, it was not a waste.  My husband  and I measured and measured again before cutting our first piece.

I don't know how many of you have tried to hoist a 15 foot long, 45 inch wide piece of fabric over your head while standing on a step stool and trying to staple it over your head but it is not friggin' easy.  Getting it started was the most stressful part of the operation and I would love to tell you what my "technique" was but I couldn't tell you because it was just one foul language fest after another.  The other aggravating thing we dealt with was that the staple gun kept breaking.  I have never had any love lost over a staple gun anyway.  I think they suck, but I found one at Home Depot that had a softer squeeze than your standard chrome bastard and was easier on my smallish hands.  I didn't have to throw every bit of strength I had into each staple.  It was also kind of cute with red plastic handles.  We made it through about one piece before the gun broke and I also noticed that there was a little smudge of red on the burlap.  I immediately assumed I had cut myself.  Nope.  The dye from the red handles was rubbing off on my skin then onto my cloth ceiling.  Back to Home Depot.  We made 3 trips to the store and went through 4 staple guns.  Don't ask me why because I can't tell you.

We had decided that we would work from the center out and the first piece we put up was so off  center.  We had plenty of excess on one side and the other side did not reach the wall.  Every time we finished one piece and cut another we were sure we had learned the ins and outs and finally had a system.  Alas, every single piece was a reinvention of the wheel.

Though it is a little lumpy in spots and there is only one end of the room with dry wall to attach to, when we were done I was so happy not to see the ratty you-know-what.  And in the end, it was really the right solution to a rather complicated problem.  Access to the house systems is a simple yank of the staples.  We left the water main lever exposed at the opening of the crawl space and the sewer and water pipes over my slop sink remain uncovered.


Next episode I will tell you about my journey into the science and shopping for just the right lighting.  Bill Nye I am not, but I will try to explain it as best I can.


I'll be on vacation in Maine, recovering from all of this and be back online August 28th.  Enjoy the rest of your  summer!  Here's the link to Manitoba, Russell Wright's beautiful property.  http://www.russelwrightcenter.org/redesign/home.html  P.S.  It's a great place to hike.


Tuesday, July 31, 2012

The Big Renovation - Part Deux

DAY 2

Tired and sore, my hubby and I slowly made our way downstairs to the basement that we had deconstructed into one big, intimidating mess.  The mission on day two was to seal and paint the three concrete walls and add a coat of the same high gloss white to the one and only wall of drywall in the studio.  (When we moved into the house we had only half of the basement finished so the party wall between the two spaces gives me the only drywall and by the way, the only electricity in the whole studio. ) Also on the mission plan - to seal and paint the concrete floor.

The room in total measures about 10'x26' and in an effort to minimize the distance we had to move everything we calculated that if we unloaded one side of the room into the already finished area or the basement, painted and sealed the walls and floor on the empty side, then we could leave that to dry overnight and come back and do the ceiling the next day.  Then we could move everything on the other side of the center beam to the finished side and repeat the process before rearranging the furniture and loading all the supplies back in.  So we were going to work in 10'x13' sections. 

Before starting, we had gone to Home Depot and purchased a standard, water-based concrete sealant and a bright white latex paint made for concrete surfaces.  The foundation of the house is 12 years old so we were certain it had completed it's curing process and was not going to sweat, causing it to take forever to dry.  That also meant that it would take only one coat of each to get the results we were looking for.


Initially we thought we were going to knock this right out with rollers but we discovered that the uneven texture of the walls required us to apply it with a brush.  We used 4" brushes with course bristles because the application required a lot of dappling.  I take that back - we pounded that sealant into those friggin' walls.


Fortunately by the time we had made our way around the room the sealant was dry enough to apply the paint so it was a pretty round robin work process.  Once the bright white paint was applied to the dry wall and the concrete I was suddenly less tired than I was at the beginning of the day.  The first glimpse of the vision was taking shape and I could see where we were going.


Beautiful SHINY  walls!

Now the process had to be repeated with the floor.  We did not use the same products on the floor as we did the walls.  Once again, Home Depot had a generic brand of sealant specific to floors that came in basic primer colors.  Since I had chosen a light silver grey for the floor we got a grey sealant/primer.  Both products were water based allowing for clean up that required nothing but water.  I don't know how much experience any of you have with unsealed concrete floors but let me explain that you can broom sweep a floor like this, fill a dustpan and go back right away and do it again and get the same full dustpan as before.  It is a never, never ending source of grey dust and added to that, the accumulated particles from the dust generating work I do  and we had to force ourselves to accept that the primer was not going to be applied to a pristine floor.  This time we used rollers on a pole, which gave us the leverage we needed to  force the stuff into the texture of the floor.  However, the products for the floor were thicker and  packed with adhesives causing the drying process to take twice as long.  Our schedule was now thrown off and being the control freak that I am, I found myself in deep despair.  My husband and chief slave worker was only off from work for a week.  I panicked that we would fall behind and not finish the project before the hub had to return to the job.  It's not easy being neurotic.


A note on the floor.  I wanted to put down one of those sparkly floors with the metallic speckles so it would be a little fancier.  Those floors are epoxy.  The helpful guy at Home Depot (can you believe we found someone there that was not only helpful but knew what the hell he was talking about!) explained that a) we would die from the fumes given we were in a badly ventilated basement and b) it was over 100 degrees outside with 1000 percent humidity and c) it would cost us about 3 times as much money.  Those techniques, he explain, are designed for garages and smaller, ventilated spaces.  I didn't need sparkly glitter bits that badly.  Imagine what that would have done to my schedule neurosis, never mind my wallet.

                                 Floor with primer...                               Finished off with the silver grey paint


At last!  One half of the studio was completely painted - both walls and floor.  With another day's work accomplished I left the job that day feeling very differently than I had the day before.  I could see a vision materializing.  I had imagined for years what I would do if I could renovate this space.  I dreamed of something clean and bright.  A place I wanted to be, not just because it was where my beloved work was but because the room made me feel poised, together, comfortable - like someone who could take it to the next level.

Next week:  the despised and dreaded ceiling.

Tuesday, July 24, 2012

The Big Renovation - In The Beginning

The commitment to go through every single piece and thing in my wet studio (as opposed to where I make jewelry and anything else that does not require water which I call the dry studio) was a major one and something I was not going to do unless I was comfortable with the idea of growing with my business.  Dark, sometimes dank and completely unattractive the space I had cobbled together was one that I could work in that got the job done.  Ugly as it was, once I settled in and got lost in the work, I didn't really notice that it was a dusty as the lonely trail down there and a little like sitting in the rooms that hide under the double doors in the sidewalks of NYC.

A little history...  This work space started as a little area for me to pursue a hobby that I had taken up when my son started school, to occupy a little free time with something artistic and creative.  Having come from a life in the performing arts, shutting off that part of myself all at once when my son was born was a shock to the system.  I needed to get some of myself back.  Ironically, my first workbench was the Ikea changing table we had purchased on Long Island for our Queens apartment where we lived when Dakota was born.  When we moved on from Brooklyn to Rockland County, I tossed all the baby furniture - except that changing table.  It looked to me like it could be re-purposed in a creative way.  I am a prophet.

At the onset of this project, we were cursed by an oppressive heat wave with days in the high 90s and up to 100 degrees on one of our work days.  The very first thing we did before beginning any work was run to Home Depot for a small window air conditioner that we installed in a small window in the dry studio.  May I say it was the best $129.00 we spent on the whole renovation?

I began the photo record of this process after I had started the clean up and move out process so understand that though it was nasty down there, it was neat (anyone who knows me knows that anywhere I am could be filthy but I am neat as a pin).  I wanted to show you the rawness of the space I was working in and how rustic my environment was while trying to create something beautiful.


Here you can see the raw concrete walls and the catch-as-catch-can clutter of supplies.  The grey cement sucked up all the light and was dreary as a hole in the ground - which actually it is as it is the foundation of my house!


The rack to the right in the photo holds all the boxes and trays of my shards, glass, tiles and the small objects  that I use in my piquet assiette work (http://en.wikipedia.org/wiki/Piquet_assiette).  Many of those boxes held materials from some of the first work that I did years ago and hadn't been even considered for use in about 10 years.


To the right of the plastic cabinet in the background is my sink and to the right of that, the culmination of all my waste water pipes and sewage drain.  The large garbage can on the left is my slop bucket where I dump waste water from my tools and bowls when I clean the concrete and grout from them.  If you allow all that to go down the sink, after a while you will cement your pipes closed.  The table is my main and favorite work table which was a roadside pickup.  I love that it is round.


The table that the boom box is on is the mother of my work, the changing table. On top of the bookcase is a jumble of broken chairs, future armatures and other assorted, collected detritus. The clip lights have been a part of another cobbled together system that has been my lighting grid for several years now


My dear, supportive husband took a week off from work to help me with the major construction parts of the renovation and this is him, up on the ladder, stuffing some of the insulation that was falling down on my head back into place.  There are those beeeuuutiful concrete walls again.


The unloading process was arduous and a lot more stuff was put in the trash because when you have to pick it up and move it, you really begin to question its value.  On my first pass, I think I tossed about 8 or 9 full contractor bags of stuff.  In the moving process I may have doubled that.


My husband in the emptied out room preparing the walls and floor for sealing.  The big hole you see is a crawl space we use for storage but frankly, at night there are any number of vampire/zombie type creatures that could emerge from that darkness.  Please notice the insulation once again and the piece of tape dangling there, the remains of an effort to keep it up where it belongs.


After a long 10 hour day one last look back at the mess that will be there for us tomorrow to deal with.  Covered in dust and sweaty from hard work in one of the multiple, oppressive heat waves that  have set upon us this summer we went upstairs for a shower and a glass of Big Ass Cab.

Tuesday, July 17, 2012

The Big New Vision

I've spent a lot of time and energy researching how to take NellsBelles from Etsy and a few local specialty shops to the higher end, custom market that I have longed to work in.  Craft work has made me reduce my work to small, accessible objects - frames, vases, trays and small memory jars.  I have enjoyed this work and take pleasure in the  happiness these items have imparted to their buyers.  Yet when I began this work I was doing on site installations, and larger pieces like coffee tables, lamps, stairways.  My work lives best large.  It is easier to tell my stories and the boldness of the individual objects speak more as a chorus and less like a solo.
Working Small in the Craft Market


In my never ending cyber education, I have explored the universe of e-commerce and the world of digital integration.  Using social media and more importantly, doing the things that one needs to do in order to work one's way to the top of Google searches.  This includes using "keywords" in product descriptions, social media posts, blogs, twitter, et al.  I have isolated a few artists that seem to be very adept at the art of e-business and I have studied their practices.  Along with this, and after what seems to be exhaustive research, I have narrowed my search for a company to build a custom website and organize my promotion, press - digital integration, to a couple of organization.  I am favoring a company called Clickzy, located in Alexandria, Virginia (a turf I am well acquainted with BTW).  My goal is to establish a business, locally (New York City is a big "locally") whereby I can have a moderate but loyal clientele who will turn to me for custom artistic mosaic home items and envision my Vintage Assemblage jewelry for that perfect dress for that special occasion.  Custom, custom, custom. 

This vision is evolving everyday.  I'm excited, invigorated and very tired.  In the mean time, it has occurred to me that in order to follow this new dream, new and improved work spaces are necessary.  Next up:  The Big Renovation. 


Working Big

Sunday, November 6, 2011

What's Goin' On?

It's been a while. 

NellsBelles continues to shape shift all the time as I work and grow as a craft artist.  It seems like it's a constant push/pull between the glorious work of making my products and the mind numbing labor of growing a business.  I don't mean it that way.  Growing a business is a wonderful experience but there are some mind numbing tasks involved in the process and the gear-shifting that has to take place is often difficult for me and not always a smooth process.  Creativity for me comes in waves and it seems I am either lost in my studio working, neglecting the computer, correspondence, my Etsy team, whatever is not "the work" or I am fretting about being "dry" and only minding the store.

In the mean time I want to let you know about some upcoming shows that I am doing.  On November 12th I will be at the Suffern Farmers Market with some of my Etsy team mates doing a Hudson Valley Handmade event for holiday shopping.


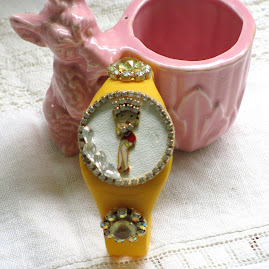
On December 2nd I will be at Bard College for a Holiday Craft Fair which is about 3.5 miles north of Rhienbeck, NY on the eastern side of the Hudson river.  I'm really looking forward to this one.  Hoping to make some inroads with a younger market with items like "Eyes On The Top of Her Head"!


Eyes On the Top of Her Head Headband


On November 19th I'll be in Chappaqua, NY and I'll have more details on that soon!